# 💎 Challenge 04: Import the Azure Developer College's repository and set branch rules 💎
⏲️ Est. time to complete: 15 min. ⏲️
# Here is what you will learn 🎯
In this challenge you will learn how to:
- Import the Azure Developer College's repository into your organization
- Set branch rules to require reviewers and status checks
# Table Of Contents
- Import the Azure Developer College's repository into your organization
- Set branch rules
- Manage access
- Summary
# Import the Azure Developer College's repository into your organization
In the last challenges we have learned a lot about GitHub features and Azure bicep. Now it's time to come back to the Azure Developer College's sample application and connect the dots. In the next challenges and breakout sessions we want to show you how to use a CI/CD workflow to deploy the sample application to Azure using GitHub Actions workflows. All Azure bicep and GitHub Actions workflows are already available in the Azure Developer College's repository. Don't worry you don't have to implement all parts to create a professional CI/CD workflow. We just need to import the repository into your GitHub organization.
So, let's get started!
Navigate to your GitHub organization and go to the section Repositories and create a new repository. In the New repository form click the Import a repository link.

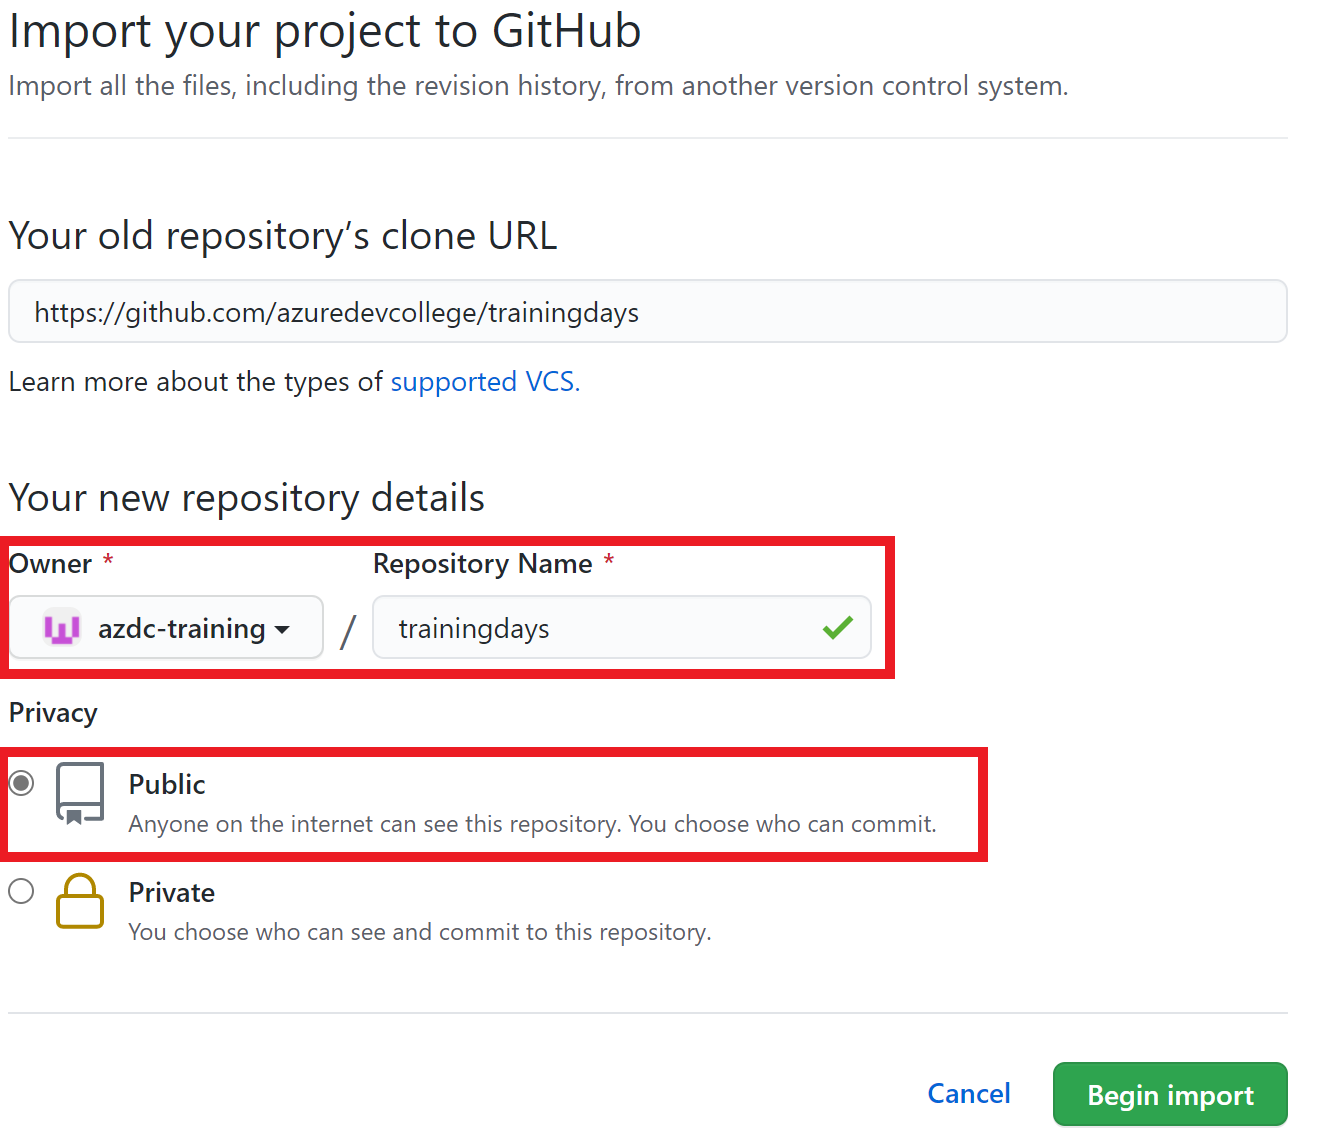
In the Import your project to GitHub view, we need to specify the URL of the
repository we want to import. Use the URL of the Azure Developer College
traningdays repository
https://github.com/azuredevcollege/trainingdays (opens new window).
Use the name trainingdays as repository name.
DANGER
🛑 Be careful and use the right owner for the repository you want to import!
We need to make the repository public, as we want to set Branch rules later in this challenge. Branch rules are only available for public repositories on the free tier. After all values are set, we can start the import.
It may take some time (several minutes) until the repository is imported.
After the import was successful, we can get started and take a look at the repository. Don't worry if there are still some branches that not yet merged into the master. When importing a repository, all branches are imported. The college is continuously being developed in branches, but we can ignore these for now.
TIP
📝 You can also clone the original repository, change the url of the origin remote, and push into a new empty repository.
git clone git@github.com:azuredevcollege/trainingdays.git
cd trainingdays
git remote set-url origin git@github.com:<your_org>/trainingdays.git
git push
# Set branch rules
With branch rules you can protect your branches and enforce certain workflows, such as requiring an approving review or passing status checks for all pull requests.
We want to establish the following workflow for all our pull requests before changes can be merged into the master branch:
- A pull request needs at minimum one approving review
- All status checks must pass
To set a branch rule for the master branch, navigate to the imported
trainingdays repository and go to the Settings section. On the left
navigation bar choose Branches. Under Branch protection rules we can add a
new protection rule.
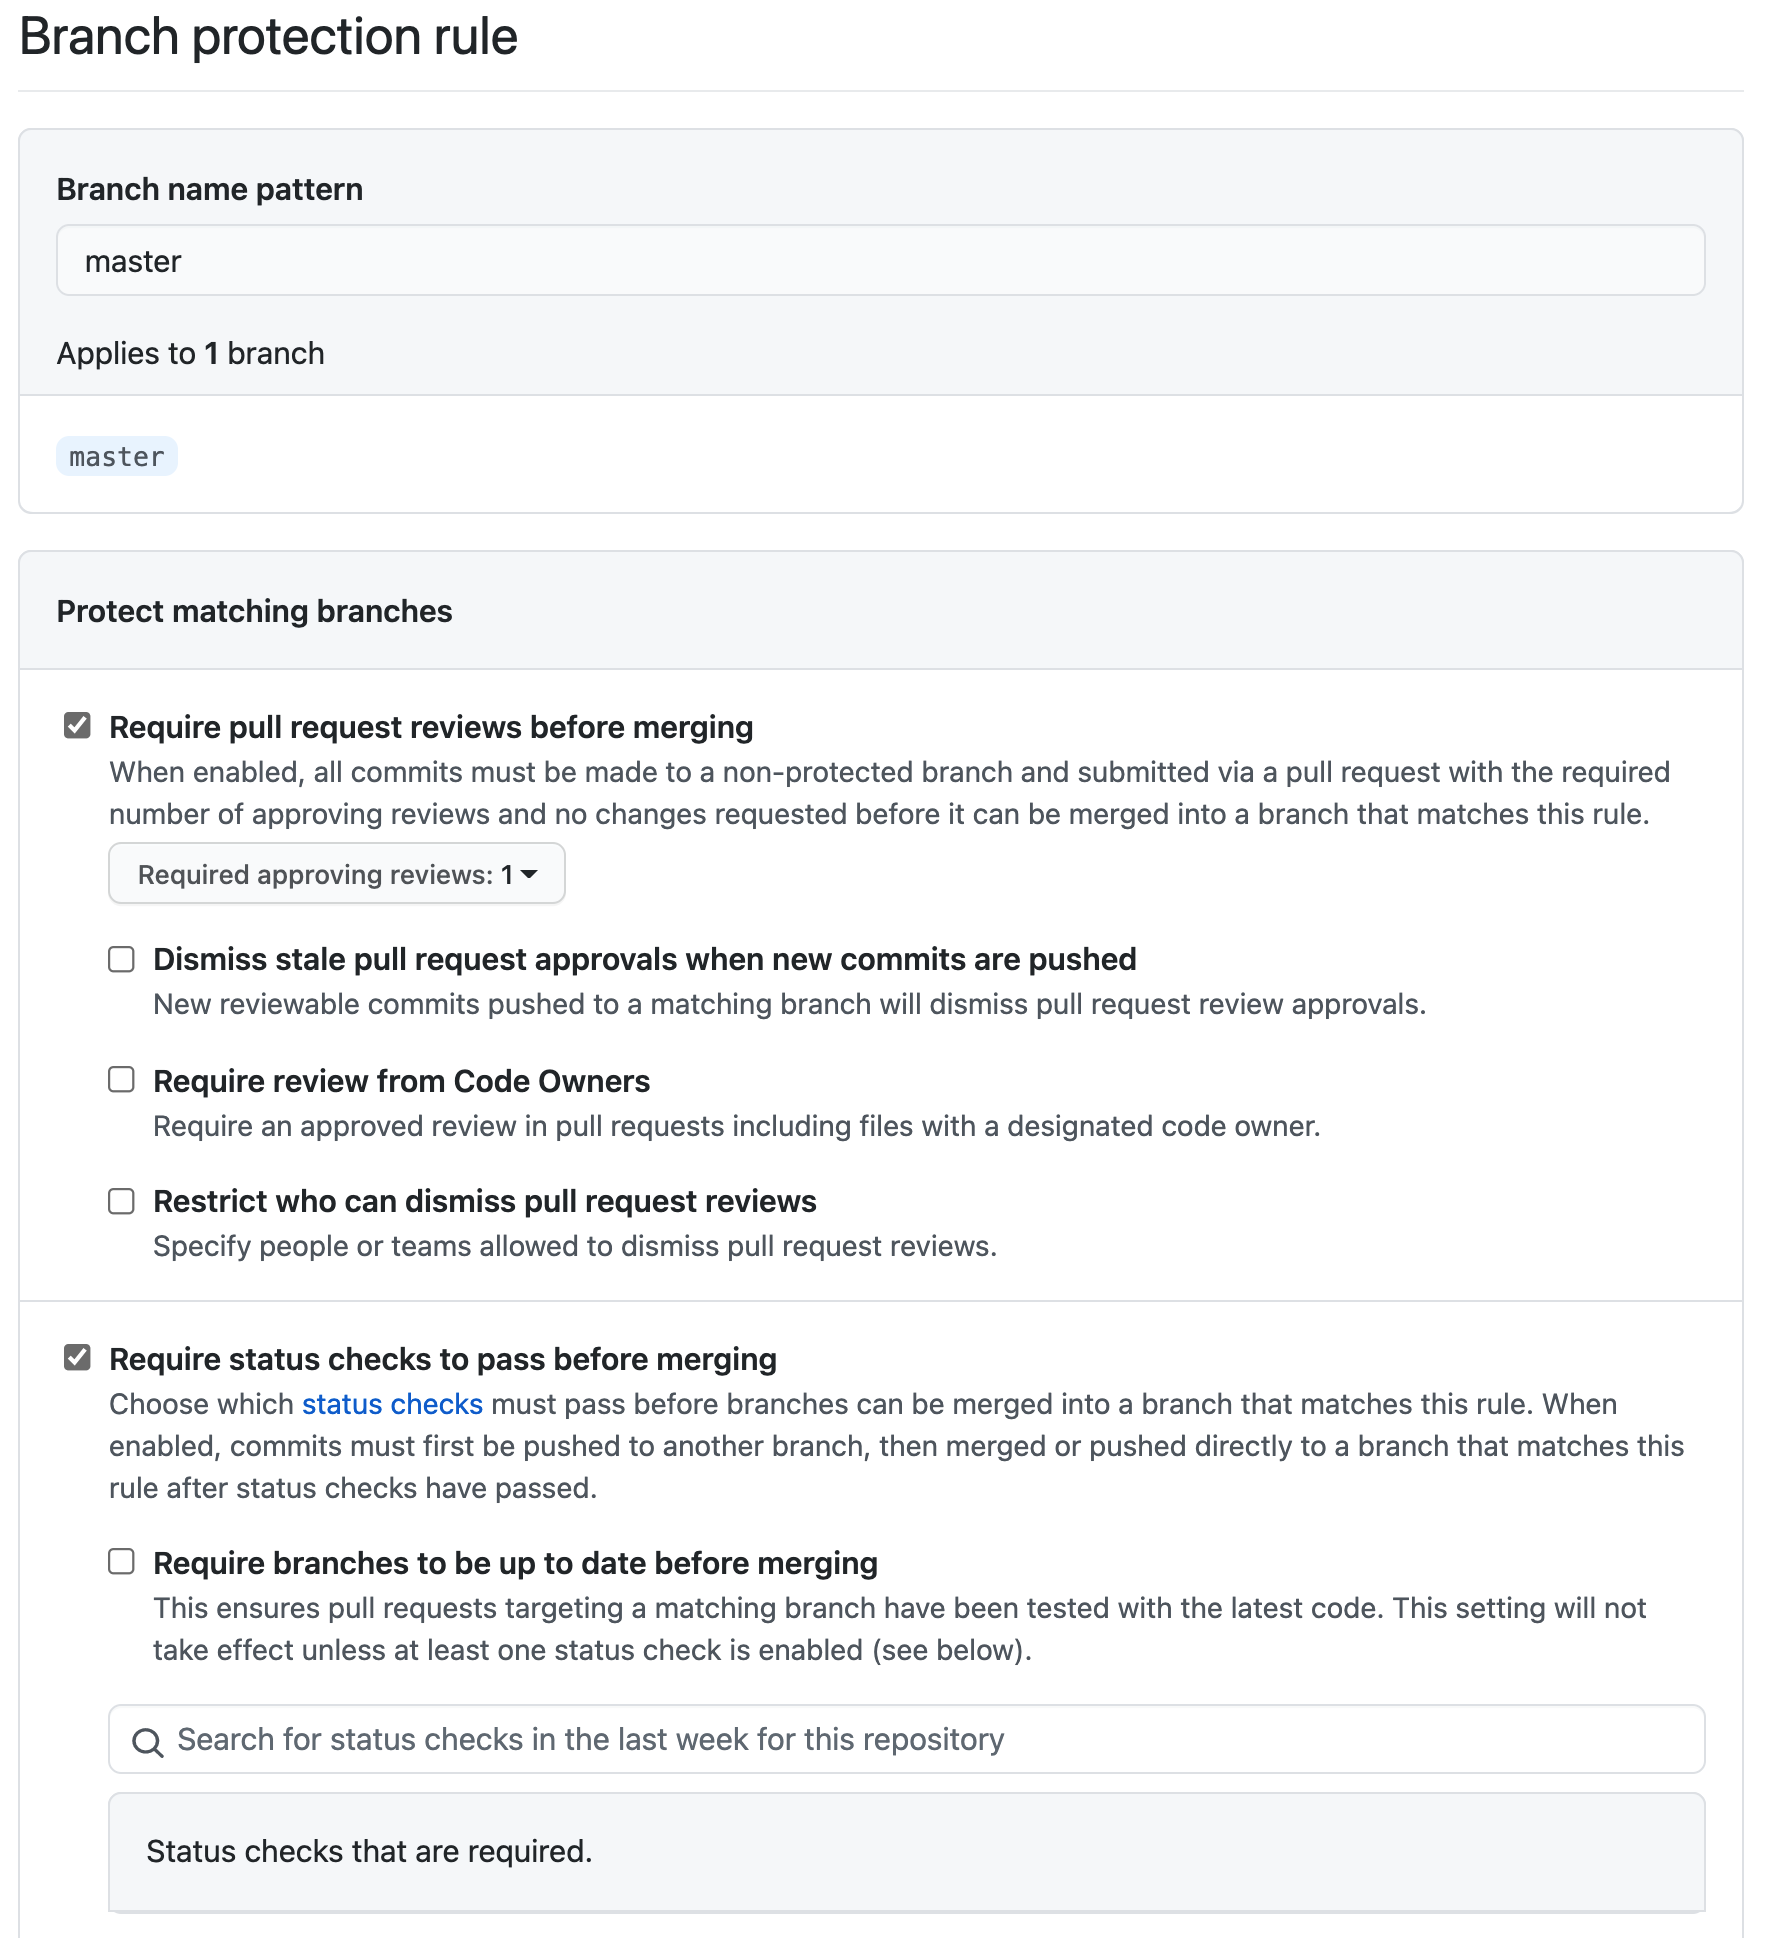
In the view Branch protection rule we use master as Branch name pattern as
we want to apply the rule to the master branch only. Now we specify in Protect
matching branches which rules we want to apply.
- Set Require pull request review before merging and require one approving reviewer
- Set Require status checks to pass before merging
TIP
📝 If you want to enforce all configured restrictions even for administrators. Set Include administrators.
Take your time and have a look at the other protection rules. You can find more about them in the GitHub Documentation here (opens new window).
# Manage access
At the moment you, as the repository's owner, are the only one who can contribute to the repository and manage issues and pull requests. As we have applied branch rules, we need to give access to other people to allow them to manage issues and pull requests. We have already seen how to manage access and grant write permissions to a repository in 00-challenge-org.
Now, grant write permissions to the AzDC-Team we created in 00-challenge-org.
# Summary
With branch protection rules we can protect branches and enforce certain workflows. In our case we have applied rules which enforce the following workflow:
- whenever we want to make changes in the master branch, we have to create a new branch from the master first, as a direct push to the master branch is prevented
- once the work in the new branch is completed, we have to integrate it into the master branch via a pull request
- the pull request must be verified by at least one reviewer
- status checks must pass (we will create them in the next challenge)
In the next challenge we will see how we can request reviewers to approve a pull request and how we can add GitHub Actions workflows as status checks.